

Tutorial time! Before I show how to do smoky eyes, night make-up or even avant garde I thought of sharing how to do an everyday make-up first. here's a before and after shot:
 |
| yes, the before shot is just gross so please don't stress it out. :) |
 | ||
| by the way, I've done a bit of eye make-up here but don't worry I'll show a step-by-step |
 |
| Apply concealer |
 |
| Find your crease! |

Take a beige or light gold eyeshadow and using a flat brush, dust it all over your lids. (please check the diagram above if you're lost, hehe)

Highlight your brow bone and inner corner of your eyes with a light and shimmery eyeshadow.


If you used a liquid liner, wait for it to dry before doing this next step! take the warm brown eyeshadow again using the flat brush, line your lower lash line half way (follow the red line) then line the remaining half with the highlighter you used for your brow bone.


Curl your lashes and apply mascara.
Final eye make-up:

Just apply blush and lipstick! I don't contour and highlight most of the time, maybe only on special occasions but if you're just going to work, strolling the mall or meeting up with friends you can do without those (not unless you really want to, right?)

Products Used:
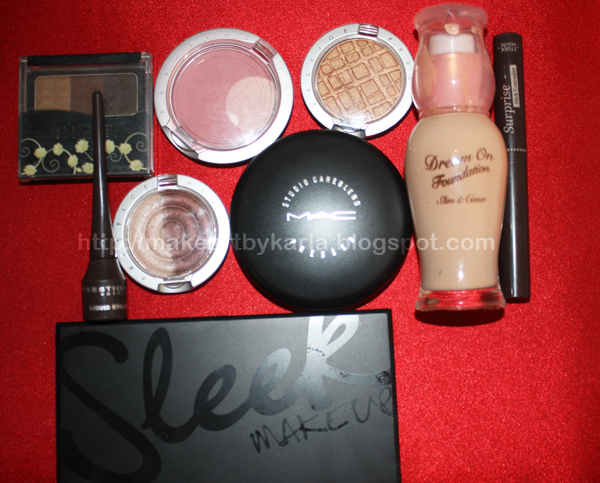
Some items may not be seen on this photo
Foundation: Dream On by Etude House
Concealer: Surprise me, Etude House
Eye Primer: Proof 10 eye primer, Etude house
Setting powder: Mac, I use my pressed powder to set everything.
Suesh Make-up toolkit brushes
Eyeshadow & highlighter: Prestige and Sleek
Eyeliner: Prestige liquid eyeliner
Mascara: Estee Lauder lash primer and Maybelline Mascara
Blush: Prestige
Eyebrows: in2it
Lip color: Maybelline
What did you use for your brows? What is its color? :D
ReplyDeleteHi Biena! I used in2it, its the small black case with three shades inside (please see the photo of "products used", its on the upper left side) I mixed the darkest and medium brown. :) thanks for visiting, will check your blog too!
DeleteI'm not really good with make-up. Thanks for sharing. Will take note of this. :)
ReplyDeleteGlad to share! :) thanks for visiting! :)
Delete